
Need help setting this up?
If you'd rather not deal with the technical side, we can fully set up and manage your Microsoft 365 for you — including email, DNS, and ongoing support.
Navigate to Services and then click on the 'Manage Exchange' button then the customer:
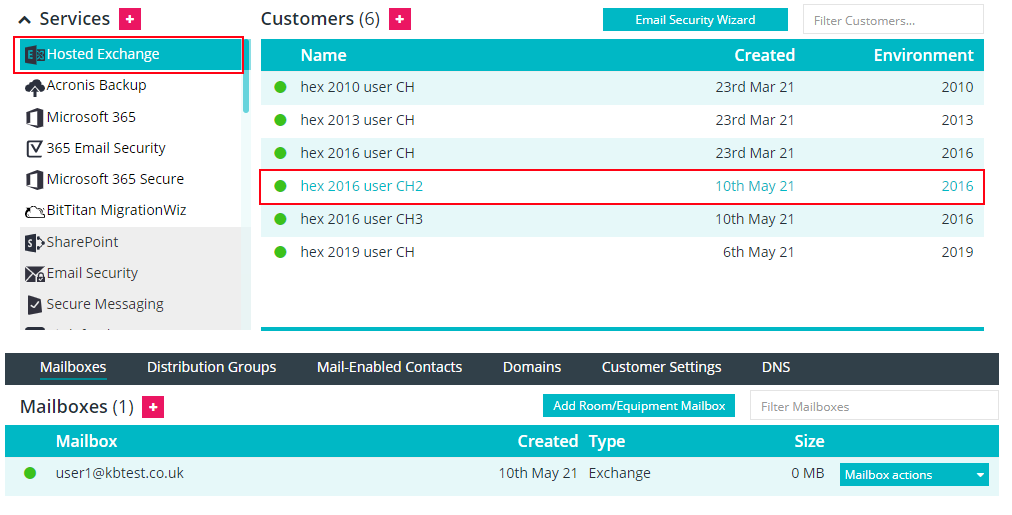
Click on the mailbox to open the tab view, then click on the Forwarding tab:
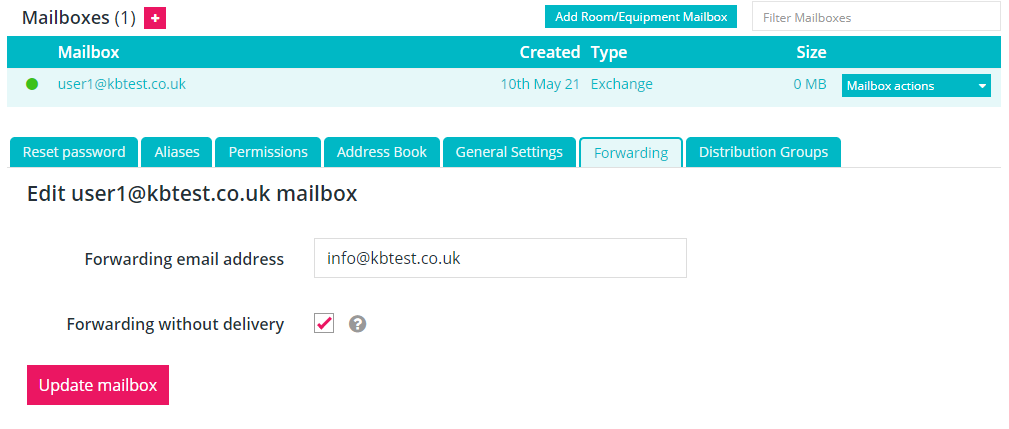
Enter the forwarding email address, i.e. where you want the mail to be forwarded to. If you want the mail to be forwarded without being delivered to this mailbox (for example if the original owner of the mailbox has left and you don't want their mailbox filling up) tick the Forwarding without delivery checkbox, as shown above.
Note that you can only forward to a single email address. If you need to forward to multiple addresses, create a distribution group with those addresses as members and enter the group address as the forwarding email address. This article explains how to create a distribution group and manage the membership of the group.
Related Guides
- Basic mailbox settings for Outlook and other email clients (POP/IMAP)
- Diagnostics log collection in Support and Recovery Assistant
- Add an Outlook.com or Office 365 account
- How to Create Email Account in the Control Panel
- Groups naming policy
Prefer us to handle this?
We provide fully managed Microsoft 365 setup and support — so you can focus on running your business.